
How to Browse the Funding Database
Learn how to explore the full Fundsorter funding database with filters, and save the opportunities you want as a CSV or PDF.
Browse Database is only available to organisations on an annual subscription. If your organisation pays monthly, you won't see it in the menu. To switch to an annual plan, see Billing and accounts or email [email protected].
Browse Database is different from Find Funding. Find Funding matches you automatically with the best fit opportunities for your organisation and drafts your applications. Browse Database lets you look through the whole database yourself, using your own filters.
Browsing the database
Step 1: Open Browse Database
Click 'Browse Database' in the main navigation. It has a 'New' label beside it, and only appears for organisations on an annual subscription.

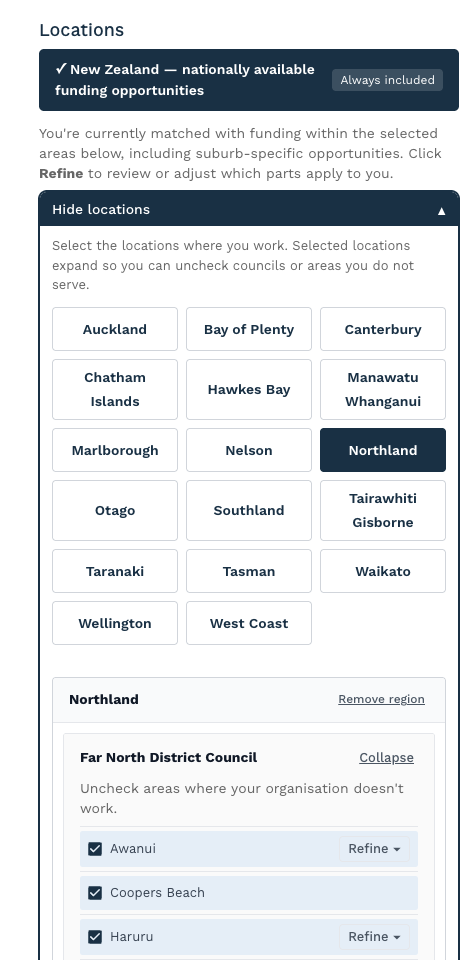
Step 2: Choose your locations
Click 'Choose locations' to open the location picker.
- With no locations selected, you'll see nationally available funding opportunities only.
- Select a region to add it. Its councils are all ticked to start with. Untick any councils or areas where you don't work.
- Click 'Refine' on a council to choose specific areas within it.
- Click 'Remove region' to take a region off again.
Nationally available funding is always included alongside the locations you choose.
Step 3: Set your funding preferences
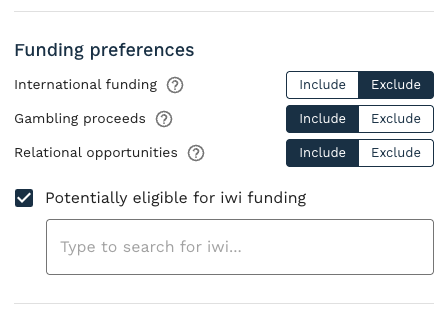
Choose Include or Exclude for each of these:
- International funding: funding opportunities from outside of New Zealand.
- Gambling proceeds: proceeds from lotteries, pokies and casinos.
- Relational opportunities: funders who don't have an open grants process but are open to being approached.
Hover over or select the (?) icon next to each one for a short explanation.
If your organisation may be eligible for iwi funding, tick 'Potentially eligible for iwi funding' and choose your iwi.
Step 4: Set a minimum grant size and round timing
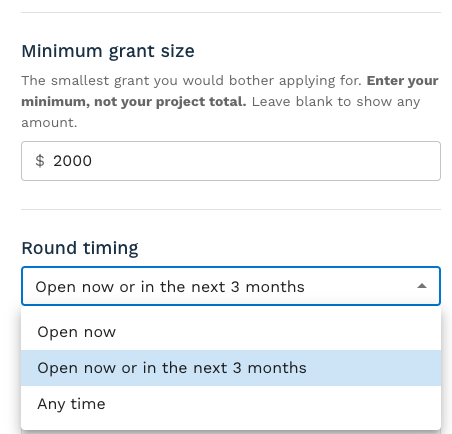
- Minimum grant size: enter the smallest grant you would bother applying for. Enter your minimum, not your project total. Leave it blank to show any amount.
- Round timing: choose 'Open now', 'Open now or in the next 3 months', or 'Any time'.
Step 5: Add keywords and tags (optional)
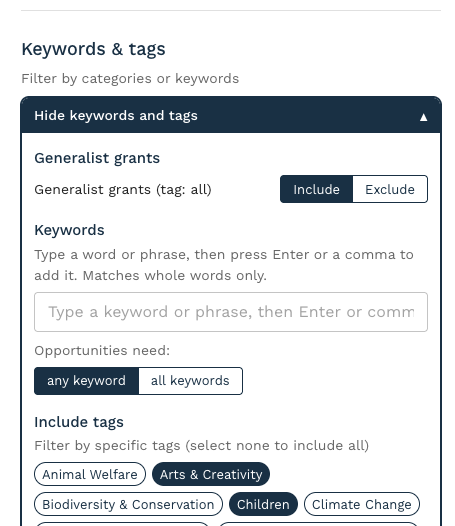
Click 'Choose keywords and tags' to narrow your search further.
- Generalist grants: choose whether to include or exclude grants tagged as open to all purposes.
- Keywords: type a word or phrase, then press Enter or a comma to add it. Keywords match whole words only. You can add up to 20, and choose whether opportunities need any keyword or all keywords.
- Include tags: select tags to show only opportunities with those tags. Select none to include all. You can choose whether opportunities need any or all of the selected tags.
- Exclude tags: opportunities with any excluded tag won't appear in your results.
Step 6: Search
Click the green 'Search' button. On a computer the search bar stays on screen while you scroll through your filters. On a phone it sits at the bottom of the screen.
If you change a filter after searching, the search bar will say 'Filters changed since this search. Click Search to update.'

Step 7: Review your results
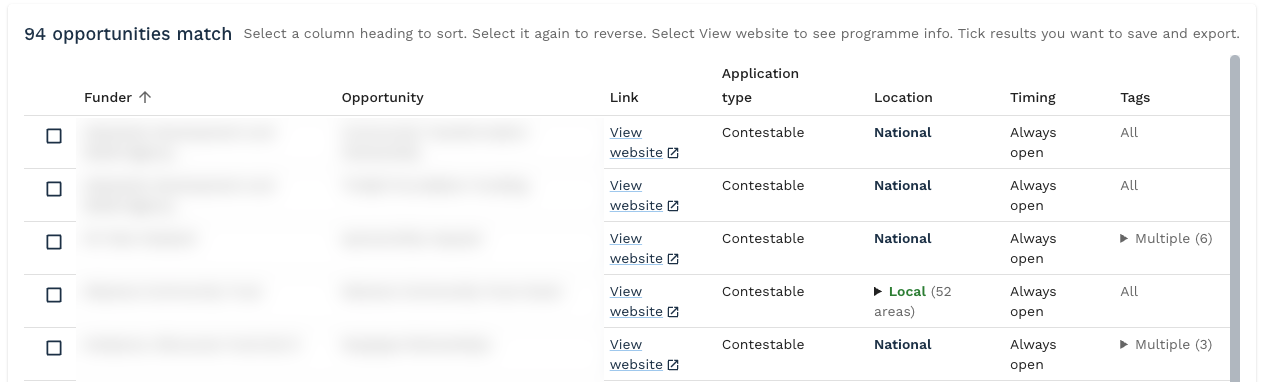
Your results show 25 opportunities per page. Each row shows the funder, the opportunity, a link to its website, the application type, location, timing and tags.
- Select a column heading to sort by it. Select it again to reverse the order.
- Select 'View website' to see the programme information. It opens in a new tab.
- Local opportunities show which areas they cover. Select 'Local' to see the list.
- Opportunities with more than one tag show 'Multiple'. Select it to see all the tags.
- On a smaller screen, use the scroll bar at the top or bottom of the table to see more columns.
If nothing matches, try removing a filter, adding locations, or setting Round timing to 'Any time'.
Saving and exporting opportunities
Step 8: Tick the opportunities you want
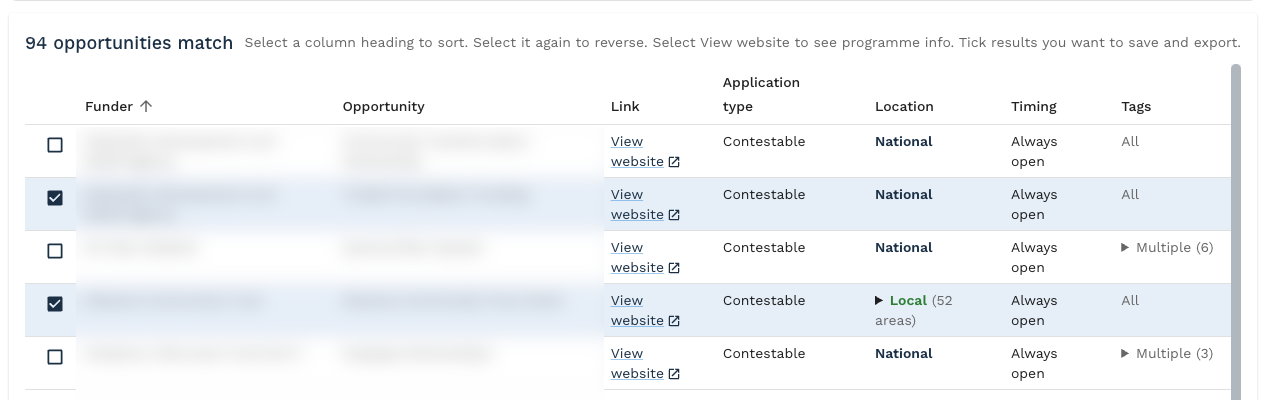
Tick the box at the start of a row to save that opportunity. Ticked rows are highlighted, and the search bar shows how many you've selected.
You can select up to 20 opportunities. Your selections stay while you change filters, run new searches, or move between pages, until you close your browser tab.
Step 9: View and export
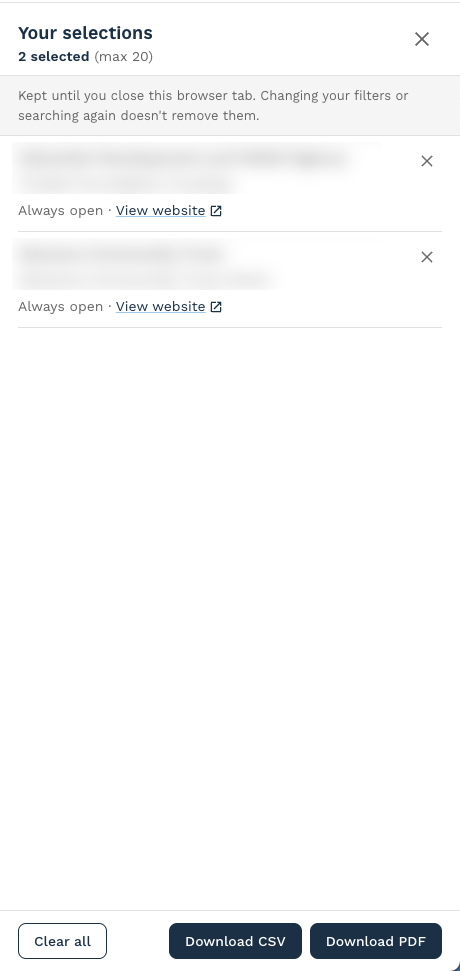
Click 'View & export' in the search bar to see your selections.
- Select the × next to an opportunity to remove it.
- Click 'Clear all' to remove every selection.
- Click 'Download CSV' to save a spreadsheet you can open in Excel.
- Click 'Download PDF' to save a printable list.
Both downloads include the funder, opportunity, link, application type, location, local areas, timing and tags for each opportunity you selected. Your selections stay after you download, so you can keep adding and download again.
Tips for success
Your search is kept while you work
If you leave Browse Database and come back in the same browser tab, your filters, results and selections will still be there. They're cleared when you close the tab or log out.
Search limits
To keep the database fair for everyone, you can run up to 30 searches in 10 minutes and 300 searches in a day. Moving to another page of results or re-sorting counts as a search. If you reach a limit, you'll see a message telling you when you can search again.
Want matches done for you?
Go to Find Funding and run a scan. Fundsorter will match you with the best fit opportunities for your organisation and draft your applications.
Email [email protected] if you have any questions.